Updating Godaddy DNS settings
Introduction
This page contains instructions for updating your domain so that it points to Drive Marketing’s servers.
These instructions are designed to work for domains:
- Registered through GoDaddy
- Using GoDaddy’s name servers / DNS servers
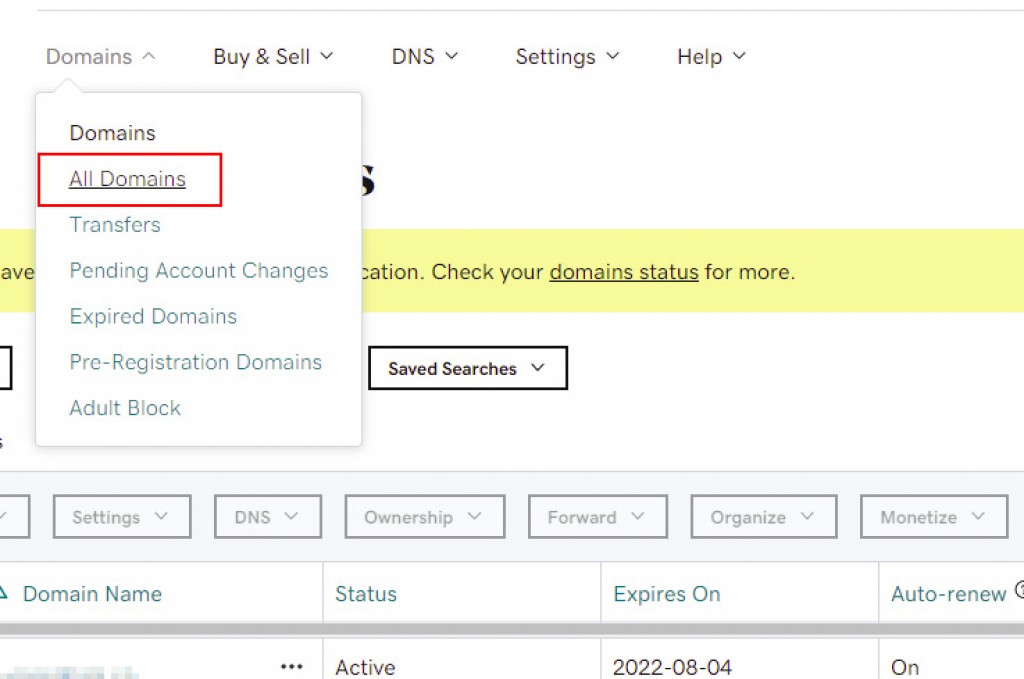
1. Select "All Domains"
Log in and click on “All Domains” from the “Domains” menu item
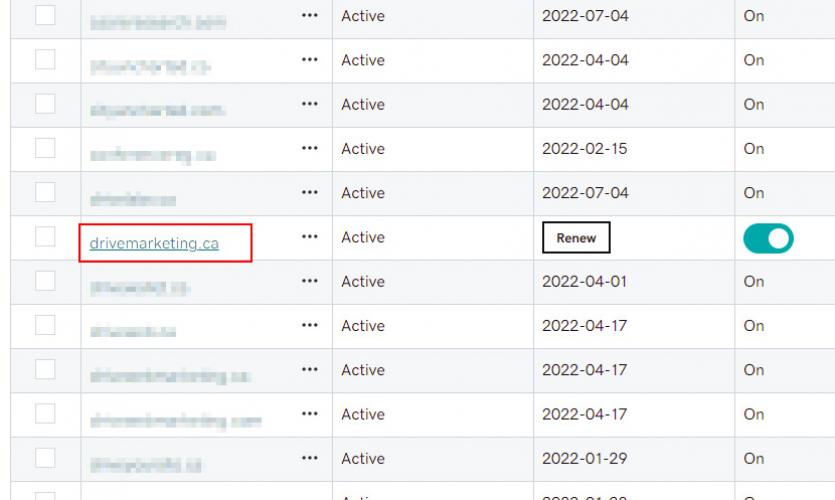
2. Open the Details Page of the Target Domain
Find the target domain in the list and click on it to open up the details page
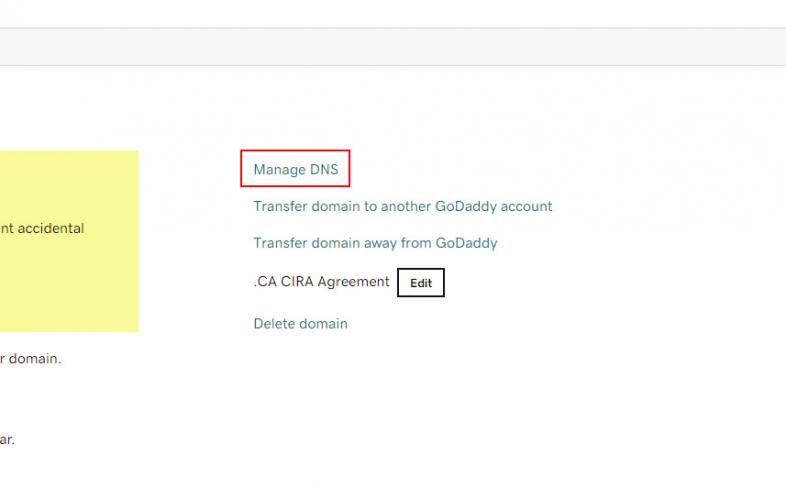
3. Scroll down to “Manage DNS”
Scroll down to “Manage DNS”
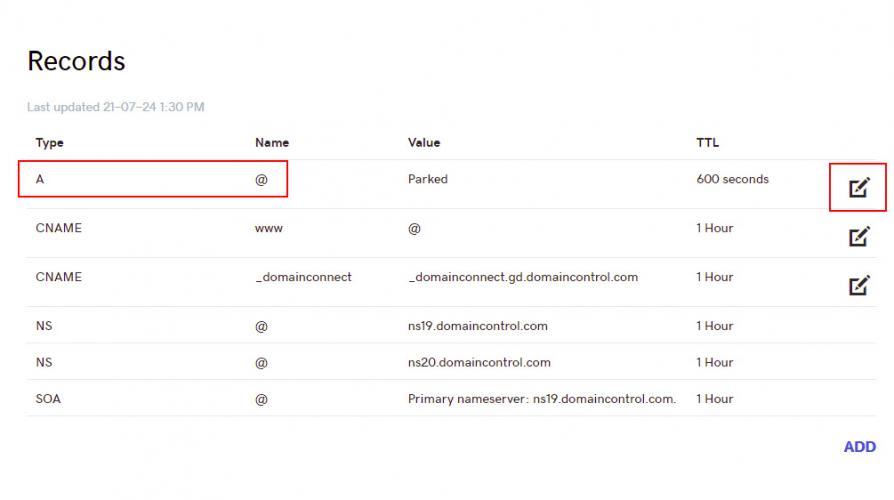
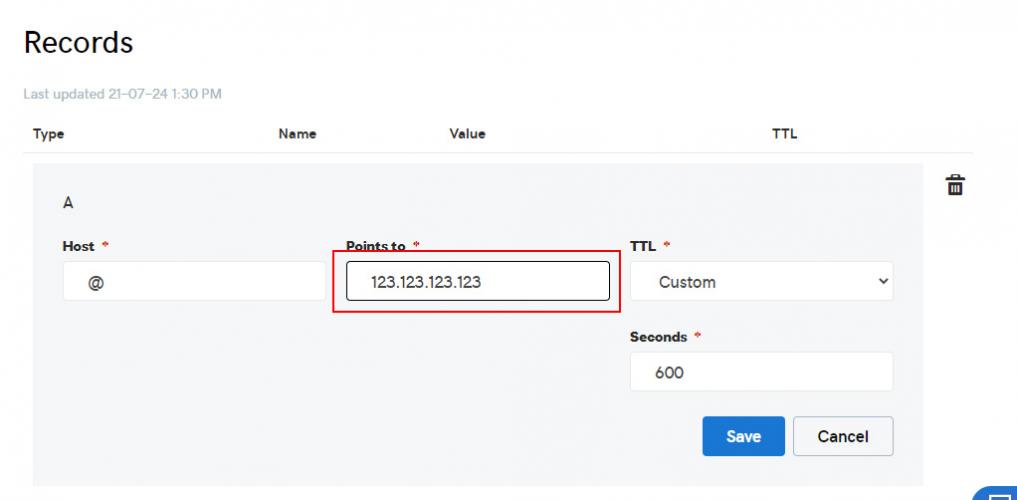
4. Edit 'A' Record
4. Click on the pencil icon (“edit”) next to the “A” record for “@”.
5. Update the 'Points To' Field
Update the 'Points to' field with the new IP address and press 'Save'.
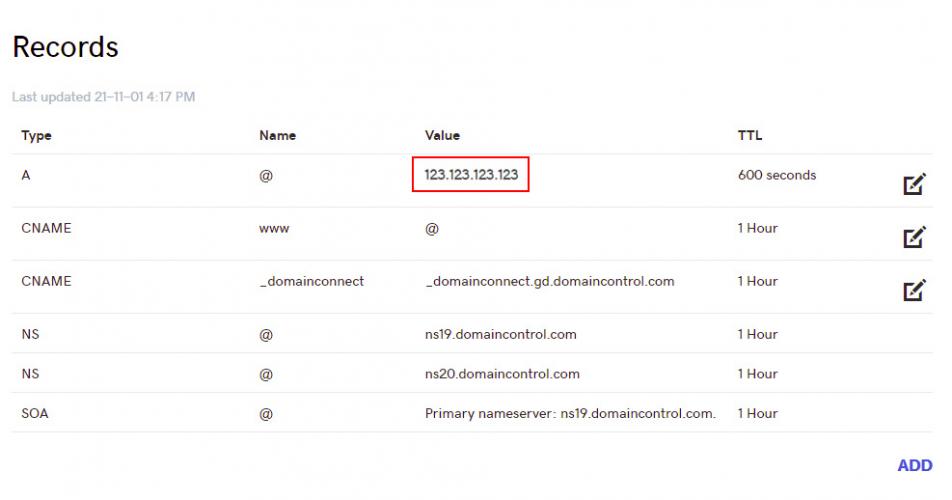
6. Confirm the DNS settings
The last step is to confirm that the DNS settings have been updated successfully by verifiying the value for 'Type A' / 'Name @' on the Records page.
Congratulations! Your DNS settings have been updated.
Final Notes
Changing DNS records requires an hour to take effect. In some cases, changes can take up to 24hrs to take effect. During this time, the website could be unreachable or point back to the old server.
To track the DNS record from servers around the world, use https://whatsmydns.net/ and confirm the A record.
Changing the DNS record without fully understanding the implications can have serious consequences for your web hosting, email, and application server. Follow the directions above with extreme caution.
Drive Marketing provides the above instructions to assist clients who want to make their own updates, but takes no responsibility for the implementation of said instructions.