Updating Godaddy DNS settings
Updating Your Domain DNS (GoDaddy)
This guide explains how to update your domain’s DNS settings so that it points to Drive Marketing’s servers.
These instructions apply to domains that are:
- Registered with GoDaddy
- Using GoDaddy’s default DNS / name servers
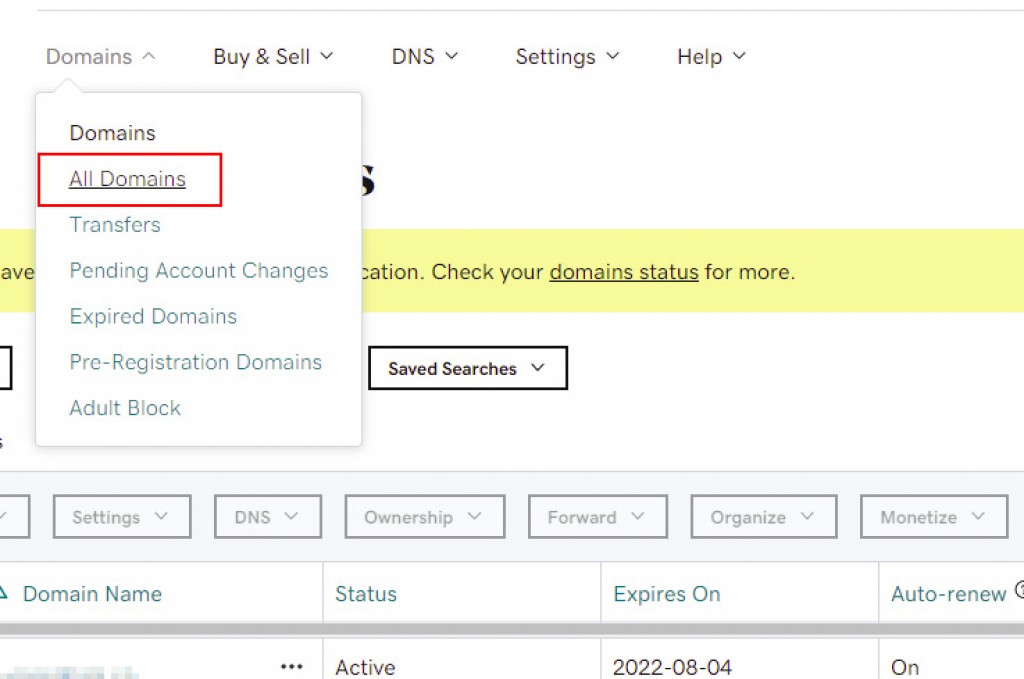
1. Open Your Domain List
- Log in to your GoDaddy account.
- From the Domains menu, select All Domains.
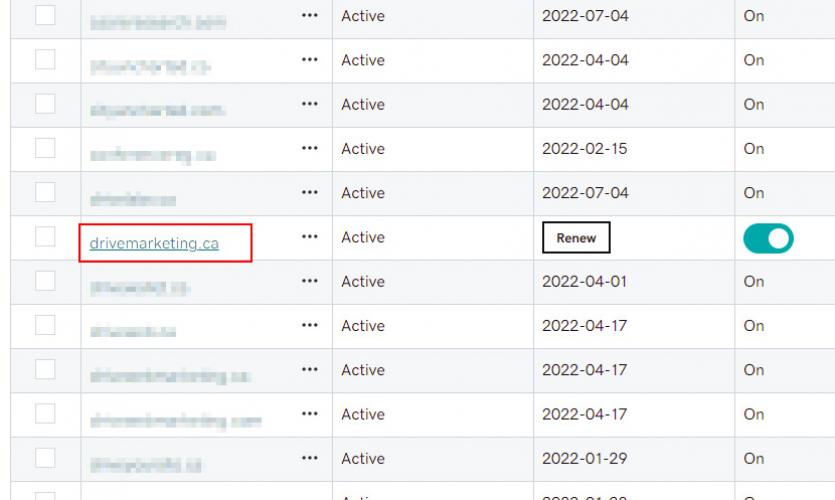
2. Select Your Domain
- Locate the domain you want to update.
- Click the domain name to open the Domain Details page.
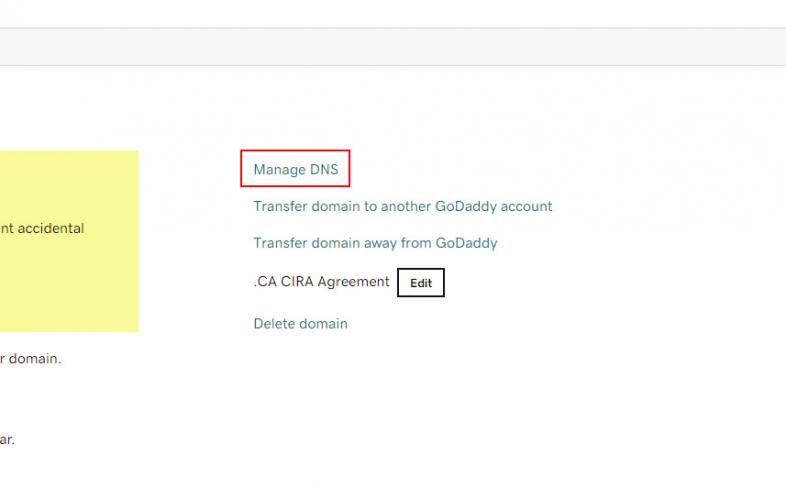
3. Open DNS Management
Scroll down the page and click Manage DNS.
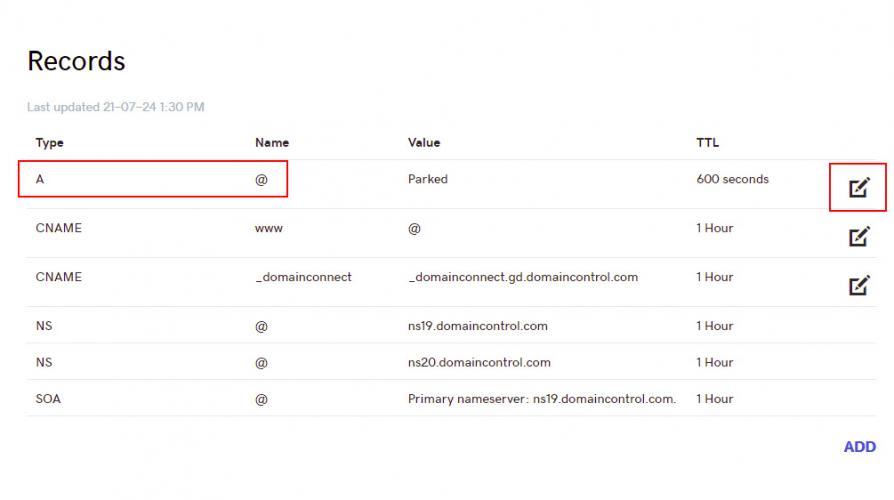
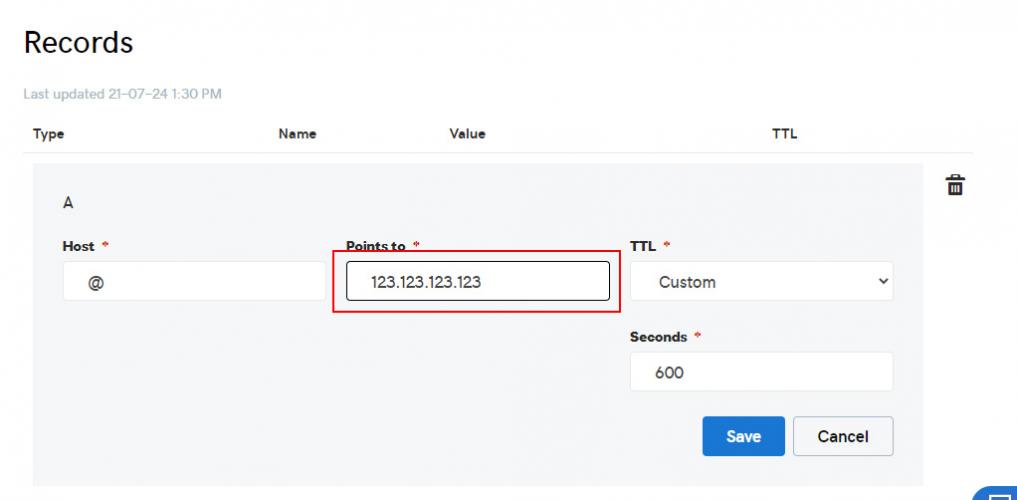
4. Edit the A Record
- Locate the A Record with the Name set to @.
- Click the Edit (pencil icon) next to the record.
5. Update the IP Address
- Update the Points To field with the IP address provided by Drive Marketing.
- Click Save.
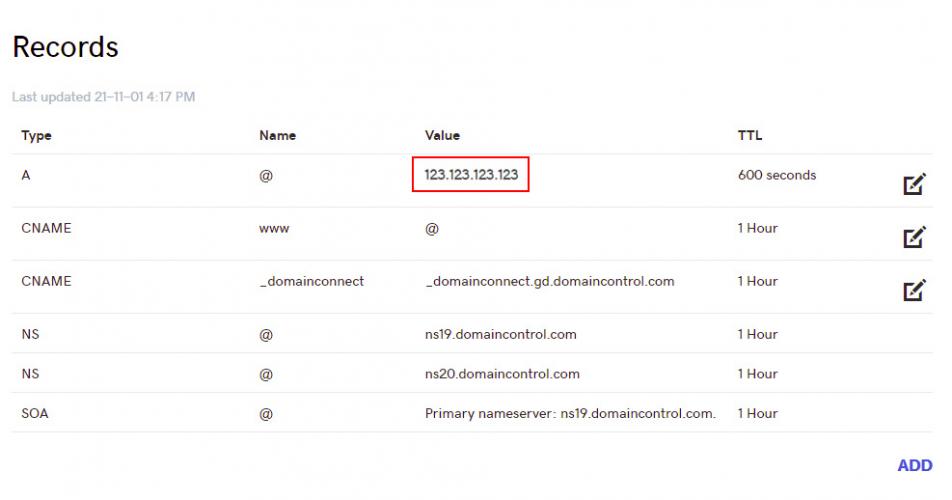
6. Confirm Your Changes
After saving, confirm that the A Record shows:
- Type: A
- Name: @
- Points To: the new IP address provided by Drive Marketing.
If these values appear correctly, your DNS update has been applied.
Final Notes
DNS updates may take some time to fully take effect.
- Most changes update within 1 hour
- In some cases, it may take up to 24 hours
During this period, your website may temporarily appear offline or continue pointing to the previous server.
You can monitor DNS updates using:
https://whatsmydns.net/
Important Note
Changing DNS records incorrectly can affect your website, email, and other services connected to your domain.
Drive Marketing provides these instructions for clients who prefer to make their own updates. Please proceed carefully when modifying DNS settings.